PREFACE: Before you begin to follow this tutorial, you need make cake pop dough. Perform steps 1-5 of my tutorial on making cake pops which are listed HERE. Once you have completed my steps or your own method to make cake ball dough and your dough has set in the fridge or freezer so it is easy to shape, proceed with instructions below to create Halloween Cake Pops.
INGREDIENTS/MATERIALS
- Basic Ingredients to Make Cake Pops (can be found in my tutorial on making cake ball pops HERE.)
- For Halloween Cake Pops coating, you will need White Almond Bark or Candy Melts and Yellow, and Black or Grey Icing Dye or Yellow and Grey Colored Candy Melts.
- Cookie Cutters - Halloween shapes (moon, ghost and grave stone). Purchased at JoAnn's.
- Sprinkles or Candy for whites of mon eyes.
- Black Edible Marker or Food Writer
- Black, Blue and Red Gel Icing
A. MAKE DOUGH INTO HALLOWEEN SHAPES
1. Cut Shapes Out of Dough with Small Cookie Cutters or Hand Carve - Scoop out a handful of cold dough and squeeze the dough between your hands, rolling it from one hand to the other so the dough is tightly packed. Place the dough on a non-stick surface and pound or roll it out until it is about an inch thick. Use cookie cutters to create dough shapes. If cookie cutters are not an option, you can hand carve the shapes using a knife tip. Printed and cut-out images can be used for tracing.
2. Freeze to Set
2. Freeze to Set
B: MAKE DOUGH SHAPES INTO CAKE POPS
1. Prepare your Work Space -
1. Prepare your Work Space -
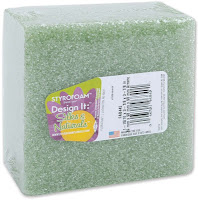
- Foam Board in Freezer - You will need your foam board close or in your freezer. You will be dipping, decorating and setting one cake pop in the foam to dry/set all in the matter of about fifteen seconds so your space will need to be arranged for efficiency.
- Dough Shapes Near Microwave
- Aluminum Foil Covering Countertops - I have my foam board in the freezer, my dough balls on a pan next to my microwave, and aluminum foil covering my counter where I coat and sprinkle/decorate the cake balls.

Crafty Gal Tip: Skewers Instead of Lollis...I use barbeque skewers for sticks. They are long so I break them in half or start by using scissors to cut them in the middle and then break them on the cut. Lolli sticks work just fine, but they are a bit larger in diameter which makes a larger hole in the cake ball when inserted and ultimately the risk of the cake ball sliding down the stick once they become heavier with the chocolate coating is larger too.
2. Secure Dough Shapes to Sticks - In order to help your dough shapes stay on the sticks, you need to first dunk the sticks into melted almond bark or candy melts (melting instructions in next step) about 1/2 an inch and then put the melted chocolate end of the stick straight into your dough shapes. Push the stick, coated-end into the bottom of the dough shape and about half way through.
 Crafty Gal Tip: Why I Prefer the Microwave to Heat Cake Pop Coating and How to Avoid Burning When Melting and Bubbles or Bleeding from your Final Design...Because I work with different colors and flavors of almond bark/candy coating for one batch of cake balls, I prefer using the microwave over a double boiler/melting pot so I can use multiple microwave safe containers instead of all the scraping, cleaning and reheating that goes along with the one-pot-process. If you have tried and failed with the microwave before, please read on (and view the YouTube tutorial by TastyCakePops). I feel your frustration. I've lived it. I think I've come out on the other side though.
 C: MELT/DYE COATING


1. Melt Coating for Nail Polish Base - So you have your dough pops ready for dipping... Grab a few squares of your white almond bark or if you are using candy melts, a couple handfuls and put into a microwave safe container. I've trial/error'd every type of container, mug, bowl, etc. you can think of and it's the small ZipLock containers that are perfect in size as well as conducting and distributing the heat from the microwave evenly so your coating doesn't burn when melting. Fill the container about halfway with candy melts or a couple squares of almond bark and microwave on half power for 30 seconds. Stir contents though not much melting has begun. Microwave in 30 second intervals while stirring in between until melting has taken over about half of the bark/melts.
 2. Thin Coating with Vegetable Shortening - DON'T BE CRAZY AND SKIP THIS STEP. If you forgot to get shortening, go to the grocery now and save yourself a couple hairs that you would be pulling out of your head should you proceed without it. Add shortening by the tablespoon, stirring then microwaving in 30 second intervals. You may need to add bark/melts to attain a consistency adequate for flawless coating and have enough in your container to be able to dip and engulf the cake ball.
 (Tasty Cake Pops on YouTube has the best video tutorial on heating candy melts for coating cake balls or cake pops. Her 7 part video series is below.)
3. Dye Coating - In between heating and thinning your cake pop coating you may need to add food color or icing dye if you are not using colored candy melts. To color white almond bark or candy melts, you want to add food dye the same way you add the shortening, in intervals and in between heatings, stirring until the desired result is achieved.
D: COAT CAKE POPS
1. Dip Cake Pops into Warm Colored Coating - Once your coating is warm and smooth, you can start dipping the cake pops. Cover the dough shape entirely with the coating, then let excess drip by holding the pop sideways or ball down. Tapping the stick on the side of the melting container while spinning it slowly helps remove excess coating so your coating finish is flawless in texture.
2. Freeze to Set - Put cake pops in foam board in freezer to set for a few minutes.
E: DECORATE GRAVE STONE CAKE POPS
Watch the video below to see how to make grave stones come "alive" with words and outlines.
F: DECORATE GHOST CAKE POPS
Watch the video below to see how to add face detail and outline to ghost cake pops.
G: DECORATE MOON CAKE POPS
1. Add Candy Eye and Eyebrow - Immediately after coating moon shape with warm, colored coating, add white candy for eye and brown sprinkle for eye-brow.
2. Freeze to set
3. Watch the video below to see how to add face detail to moon cake pops.
K: ENJOY


Hi nice readingg your blog
ReplyDelete