


PREFACE: Before you begin to follow this tutorial, you need make cake pop dough. Perform steps 1-5 of my tutorial on making cake pops which are listed HERE. Once you have completed my steps or your own method to make cake ball dough and your dough has set in the fridge or freezer so it is easy to shape, proceed with instructions below to create Lips cake pops.
INGREDIENTS/MATERIALS
1. Roll Dough into Balls - Scoop out a small handful of cold dough and squeeze the dough between your hands, rolling it from one hand to the other so the dough is tightly packed and in a round shape.
2. Freeze to Set - Place your shapes onto an aluminum foil covered cookie sheet and keep in the freezer for about 20 minutes. (Put each ball into the freezer after it's made so the dough can set while you are molding the rest of the dough.)
B: SHAPE BALLS INTO LIPS

C: MAKE CAKE BALLS INTO CAKE POPS
 Crafty Gal Tip: Skewers Instead of Lollis...I use barbeque skewers for sticks. They are long so I break them in half or start by using scissors to cut them in the middle and then break them on the cut. Lolli sticks work just fine, but they are a bit larger in diameter which makes a larger hole in the cake ball when inserted and ultimately the risk of the cake ball sliding down the stick once they become heavier with the chocolate coating is larger too.
1. Prepare your Work Space -
Crafty Gal Tip: Why I Prefer the Microwave to Heat Cake Pop Coating and How to Avoid Burning When Melting and Bubbles or Bleeding from your Final Design...Because I work with different colors and flavors of almond bark/candy coating for one batch of cake balls, I prefer using the microwave over a double boiler/melting pot so I can use multiple microwave safe containers instead of all the scraping, cleaning and reheating that goes along with the one-pot-process. If you have tried and failed with the microwave before, please read on (and view the YouTube tutorial by TastyCakePops). I feel your frustration. I've lived it. I think I've come out on the other side though.
D: MELT/DYE COATING

1. Melt Coating - So you have your dough pops ready for dipping... Grab a handful of Wiltons red candy melts and put into a microwave safe container. I've trial/error'd every type of container, mug, bowl, etc. you can think of and it's the small ZipLock containers that are perfect in size as well as conducting and distributing the heat from the microwave evenly so your coating doesn't burn when melting. Fill the container about halfway with candy melts and microwave on half power for 30 seconds. Stir contents though not much melting has begun. Microwave in 30 second intervals while stirring in between until melting has taken over about half of the melts.
 2. Thin Coating with Vegetable Shortening - DON'T BE CRAZY AND SKIP THIS STEP. If you forgot to get shortening, go to the grocery now and save yourself a couple hairs that you would be pulling out of your head should you proceed without it. Add shortening by the tablespoon, stirring then microwaving in 30 second intervals. You may need to add bark/melts to attain a consistency adequate for flawless coating and have enough in your container to be able to dip and engulf the cake ball.
(Tasty Cake Pops on YouTube has the best video tutorial on heating candy melts for coating cake balls or cake pops. Her 7 part video series is below.)
E: COAT CAKE POPS
1. Dip Cake Pops into Warm Colored Coating - Once your coating is warm and smooth, you can start dipping the cake pops. Cover the dough shape entirely with the coating, then let excess drip by holding the pop sideways or ball down. Tapping the stick on the side of the melting container while spinning it slowly helps remove excess coating so your coating finish is flawless in texture.

INGREDIENTS/MATERIALS
- Basic Ingredients to Make Cake Pops (can be found in my tutorial on making cake ball pops HERE.)
- For Lips cake pops coating, you will need Red Candy Melts or White Almond Bark or Candy Melts and Red Icing Dye.
- Sprinkles to give some depth to the cake pops.
- A Skinny Ink Pen, or Paint Brush or other object with a narrow, cylinder shape to use to make "crease" in middle of lip shapes.
1. Roll Dough into Balls - Scoop out a small handful of cold dough and squeeze the dough between your hands, rolling it from one hand to the other so the dough is tightly packed and in a round shape.
2. Freeze to Set - Place your shapes onto an aluminum foil covered cookie sheet and keep in the freezer for about 20 minutes. (Put each ball into the freezer after it's made so the dough can set while you are molding the rest of the dough.)
B: SHAPE BALLS INTO LIPS
C: MAKE CAKE BALLS INTO CAKE POPS

1. Prepare your Work Space -
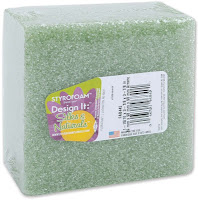
- Foam Board in Freezer - You will need your foam board close or in your freezer. You will be dipping, decorating and setting one cake pop in the foam to dry/set all in the matter of about fifteen seconds so your space will need to be arranged for efficiency.
- Dough Balls Near Microwave
- Aluminum Foil Covering Counter Tops - I have my foam board in the freezer, my dough balls on a pan next to my microwave, and aluminum foil covering my counter where I coat and sprinkle/decorate the cake balls.
2. Secure Lips Dough Shapes to Sticks - In order to help your dough shapes stay on the sticks, you need to first dunk the sticks into melted almond bark or candy melts (melting instructions in next step) about 1/2 an inch and then put the melted chocolate end of the stick straight into your dough shapes. Push the stick, coated-end into the bottom of cake ball and about half way into shape.
3. Freeze to set -
3. Freeze to set -
Crafty Gal Tip: Why I Prefer the Microwave to Heat Cake Pop Coating and How to Avoid Burning When Melting and Bubbles or Bleeding from your Final Design...Because I work with different colors and flavors of almond bark/candy coating for one batch of cake balls, I prefer using the microwave over a double boiler/melting pot so I can use multiple microwave safe containers instead of all the scraping, cleaning and reheating that goes along with the one-pot-process. If you have tried and failed with the microwave before, please read on (and view the YouTube tutorial by TastyCakePops). I feel your frustration. I've lived it. I think I've come out on the other side though. D: MELT/DYE COATING


1. Melt Coating - So you have your dough pops ready for dipping... Grab a handful of Wiltons red candy melts and put into a microwave safe container. I've trial/error'd every type of container, mug, bowl, etc. you can think of and it's the small ZipLock containers that are perfect in size as well as conducting and distributing the heat from the microwave evenly so your coating doesn't burn when melting. Fill the container about halfway with candy melts and microwave on half power for 30 seconds. Stir contents though not much melting has begun. Microwave in 30 second intervals while stirring in between until melting has taken over about half of the melts.
 2. Thin Coating with Vegetable Shortening - DON'T BE CRAZY AND SKIP THIS STEP. If you forgot to get shortening, go to the grocery now and save yourself a couple hairs that you would be pulling out of your head should you proceed without it. Add shortening by the tablespoon, stirring then microwaving in 30 second intervals. You may need to add bark/melts to attain a consistency adequate for flawless coating and have enough in your container to be able to dip and engulf the cake ball.
 (Tasty Cake Pops on YouTube has the best video tutorial on heating candy melts for coating cake balls or cake pops. Her 7 part video series is below.)
3. Dye Coating - If you are using candy melts or almond bark that need to be dyed, in between heating and thinning your cake pop coating you will need to add food coloring or icing dye. To color white almond bark or candy melts, you want to add food dye the same way you add the shortening, in intervals and in between heatings, stirring until the desired result is achieved.
E: COAT CAKE POPS
1. Dip Cake Pops into Warm Colored Coating - Once your coating is warm and smooth, you can start dipping the cake pops. Cover the dough shape entirely with the coating, then let excess drip by holding the pop sideways or ball down. Tapping the stick on the side of the melting container while spinning it slowly helps remove excess coating so your coating finish is flawless in texture.
F: DECORATE FRESHLY COATED CAKE POPS IMMEDIATELY!
After the excess coating has dripped off the cake pop and the texture is smooth but still warm, add your sprinkles by shaking container of sprinkles/candy over freshly coated cake pop or sprinkle with fingers.
G: LIPS CAKE POPS
When you are done decorating your cake pop, put the pop stick into the foam board (I put them in at a slant so the dough doesn't get too heavy and start to slide down the stick.) and let them set. Again, I have my foam board already in the freezer so when I put each pop into it, the cold air helps them set quicker and avoids dripping or moving of the ball. I like to keep the pops on the foam board in the freezer for 20 mins or until outside is hard and then remove them and place them on a foiled cookie sheet or place in large Ziplocks. Store cool but do not keep in freezer for long periods or the coating will crack and the dough will harden.

https://softswiss.com/es/knowledge-base/choosing-optimal-mix-game-vendors-online-casino/ Fabricantes, Distribuidores y Proveedores de Juegos y entretenimiento. Datos de contacto de productores, comercializadores
ReplyDeleteMake up Artists are dependable on the grounds that makeup artist utilize top quality makeup items to fulfill their client needs, remembering the significant of cleanliness also.
ReplyDeletehttps://carlita.ca/
Fashion and beauty are forms of art, allowing individuals to express themselves creatively and find inspiration in aesthetics. www.deets4style.com
ReplyDelete